Automated Staging and Production Deployment with GitHub Actions
As with any piece of software we recommend using separate staging and production environments for your Seaplane deployments. Having separate environments allows you to work on improvements without affecting end-customers. This tutorial shows you how to set up two different environments in Seaplane and automate the deployment to production with GitHub Actions.
Seaplane is working on a dedicated integration with GitHub. Let us know if you want early access by contacting support@seaplane.io
This tutorial assumes you have access to a Seaplane account -- you can sign up for an account here -- and are
somewhat familar with GitHub and GitHub actions. For this tutorial you need two
separate environments in your Seaplane account. Head over to the
Flightdeck and create two new projects, name
them staging and production respectively.
Project Directory Set Up
Create a new directory for your Seaplane project. This directory will hold your Seaplane project as well as the required GitHub action files.
mkdir my-project
Navigate into the new directory and initialize it as an empty GitHub repository.
cd my-project
git init
Create a new Seaplane project by running the following command.
seaplane init my-seaplane-project
Add the directory structure and file for your GitHub action.
mdkir -p .github/workflows && touch .github/workflows/deploy.yml
Our finished directory structure will look like this.
└── my-project
   ├── .git
   │   └─ ...
   ├── .github
   │   └── workflows
   │       └── deploy.yml
   └── my-seaplane-project
       ├── .env
       ├── .gitignore
       ├── README.md
       ├── my-seaplane-project
       │   └── main.py
       └── pyproject.toml
Creating a Repository and Production Branch
Create a new repository on GitHub. You can learn more about creating
repositories
here.
Connect your local Git repository to the remote repository by running the
following command. Replace <YOUR REMOTE URL> with your GitHub repository URL
usually in the form of git@github.com:org/repo-name.git
git remote add origin <YOUR REMOTE URL>
Navigate to your Github repository on github.com and
create a new branch with the name production. You can learn more about
creating branches
here.
Setting Up The GitHub Action
Add the following code snippet to .github/workflows/deploy.yml. Make sure to
update ./my-project on line 14 to the name of your root project directory,
i.e, the name you gave to your project during the seaplane init step.
name: Deploy to Seaplane

on:
  push:
    branches:
      - production

jobs:
  create-and-use-env:
    runs-on: ubuntu-latest

    defaults:
        run:
          working-directory: ./my-project

    steps:
      - name: Checkout code
        uses: actions/checkout@v2

      - name: Install dependencies
        run: |
            python -m pip install --upgrade pip
            pip3 install poetry
            pip3 install seaplane
            poetry lock
            poetry install

      - name: Set .env Secrets
        run: |
           echo "SEAPLANE_API_KEY=${{ secrets.PRODUCTION_KEY }}" > .env

      - name: Deploy to Seaplane
        run: |
          # deploy to seaplane
          seaplane deploy

      - name: Delete .env File
        run: |
          # Remove the .env file
          rm -f .env
Github triggers this action on every push to the production branch. The action
installs Poetry and all required packages. Next it constructs the .env file
based on the repository secrets. Then it calls seaplane deploy to deploy the
workload and finally it removes the .env file.
In this example, the app only requires a single secret, i.e, the Seaplane API
key. You can add additonal secrets after line 30 by including the following line
for each secret. Note the >> instead of >, this ensures we add additonal
secrets instead of overwriting the existing file.
echo "<SECRET-NAME>=${{ secrets.<GH-SECRET-NAME> }}" >> .env
Make sure to replace <SECRET-NAME> with the secret name you use in your python
code. Replace <GH-SECRET-NAME> with the name of your repository secret.
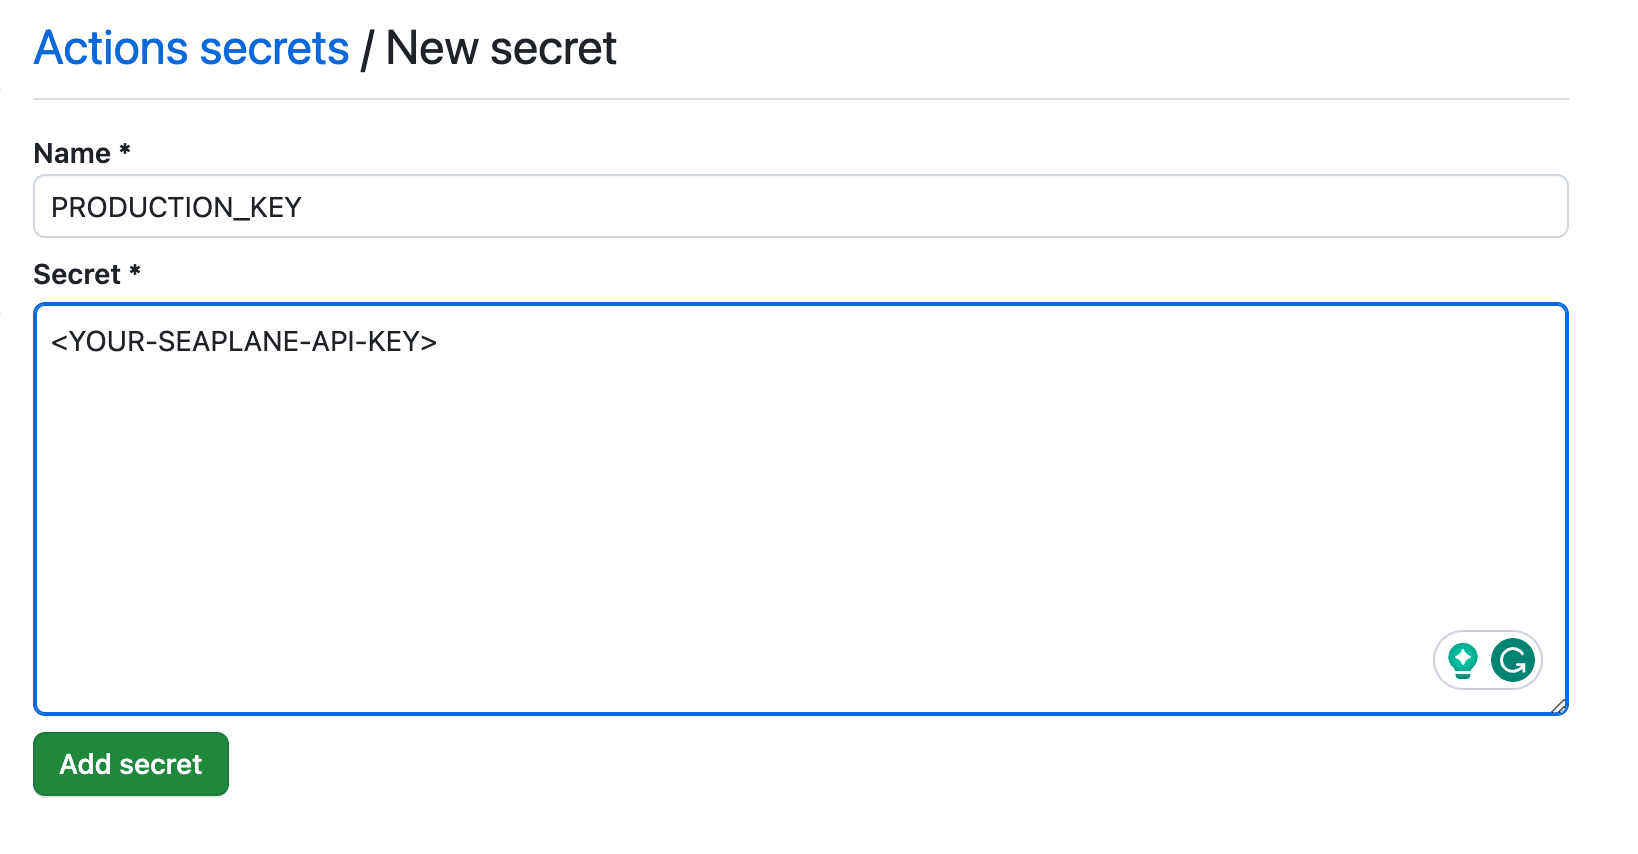
Lastly you need to add your production key (and any additional secrets) to the
repository secrets. Head over to your GitHub repository on
github.com. Click on settings → Secrets and variables → actions. Click on New repository secret. In the name field
add PRODUCTION_KEY in the secret field add your Seaplane API key. Repeat this
step for each additional secret if your application so requires.
Workflow
Now that you have your GitHub action set up, lets take a look at the suggested
workflow. In this tutorial you worked with two environments staging and
production. We recommend you work with the staging environment locally. That
is you manually deploy the workloads with seaplane deploy and with your
staging key configured in the .env file.
Manual deploy is much faster as it does not have to install all required packages every time, and is therefore better suited for debugging and development.
You can push the intermediate development work to the main branch (or any
other branch except production for that matter).
Create a pull request merging your work from the main branch into production
once you are ready to deploy to production. When merged the GitHub action
automatically triggers a deployment to your seaplane production environment.
Advanced Use Cases
For the advanced user working with more than two environments you can configure
the Github action to automatically deploy using different API keys, by adjusting
line 28-30 as follows. You can extend the action with as many environments as
you like by adding additonal elif cases.
Replace <BRANCH-NAME> and <KEY-NAME> with the respective branch and
repository secret names.
      - name: Set .env Secrets
        run: |
          if [ "${GITHUB_REF##*/}" == "<BRANCH-NAME>" ]; then
            echo "SEAPLANE_API_KEY=${{ secrets.<KEY-NAME> }}" > .env
          elif [ "${GITHUB_REF##*/}" == "production" ]; then
            echo "SEAPLANE_API_KEY=${{ secrets.PRODUCTION }}" > .env
          fi
          cat .env